

Rocks are an important part of any reptile’s life. They provide a sense of security, hiding places, and also help with regulating your reptile’s body temperature.
Although the type of rocks that are suitable may vary, it does not matter if you have lizards, snakes, turtles, fish, frogs or toads; the procedure to clean the rocks for your vivarium is the same!
Rocks can harbour bacteria, viruses, pathogenic fungi and parasites, which may cause problems for your pet and eventually lead to illness.
Therefore, it is really important to clean the rocks you bring in from the forest, field, backyard or beach thoroughly before bringing them in contact with your pet.
These risks can be minimized by properly sanitizing rocks before placing them in your terrarium.
So, what’s the best ways to disinfect rocks for a terrarium?
Here, is my go-to method to clean rocks for my reptiles:
1. Scrub the rock thoroughly using normal tap water and vinegar or soap – no need for strong chemicals in most cases!
2. Rinse the rock in clean tap water.
3. Place the rock in boiling water for at least 10 minutes. Make sure the entire rock is covered or use a lid (the steam will do the job).
4. Remember to let cool before adding it to the cage.
This method is easy and enough to kill 99% of all bugs hiding in most rocks. However, if you want to be 100% sure nothing living is left in the rocks you collect for your pets, you can use more efficient methods such as oven sterilization (see below!).
Some people purchase rocks at pet stores to use for their reptile’s habitat. These rocks are usually sanitized before they are sold.
But some rocks may have been near other animals in the shop or have been in contact with personal who have just taken care of sick animals, so to make sure your reptiles have a safe environment, you will have to sanitize the rocks yourself.
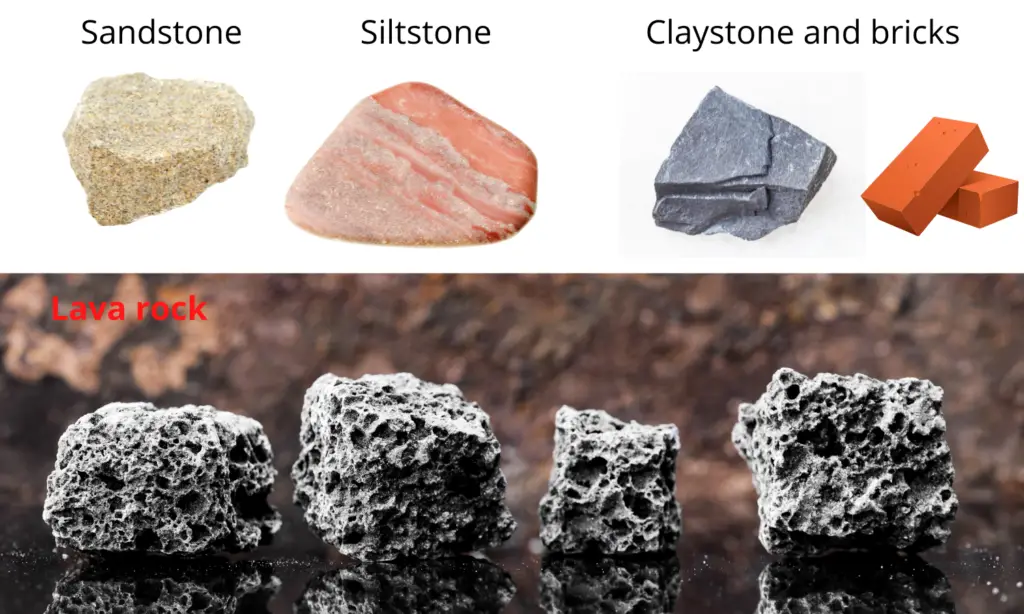
While the general method listed above is good for most rocks you find out in nature. Not all rocks can handle the rough process of boiling for 10 minutes straight.
If you want to sterilize fragile rocks like siltstone, sandstone, claystone or lava rock, it may be hard for them to resist boiling and you should go for oven sterilization as described below.
How to sterilize lava rocks?
I admit it – lava rock looks really cool in any terrarium or aquarium!
However, due to the porous nature of lava rock, it needs extra care when sterilizing for use in your pet enclosure.
While lava rocks can be relatively fragile, extra caution has to be taken to ensure that every little tunnel of the porous rock is thoroughly cleaned.
Soil or sand harbouring fungal spores may be hidden in the porous network of lava rock, and therefore it needs fairly harsh treatment.
This is why it may be a challenge to clean the most fragile lava rocks properly, but I will try to explain how I do.
This same goes for play sand or other types of sand used in reptile enclosures.
Generally speaking, boiling is not enough to kill fungal spores, so you need either higher temperatures or more harsh chemicals.
Using chemical, one solution is to thoroughly soak the lava rock in either bleach or hydrogen peroxide over night.
Make sure to shake the rocks and turn them a few times so that the liquid has a chance to reach through all the pores of the rocks.
This method is, however, not 100% sure to kill off every spore that may hide in the deepest cavities of the rocks, so you might want to subject the rocks to higher temperatures in an oven instead.
How to sterilize rocks in the oven?
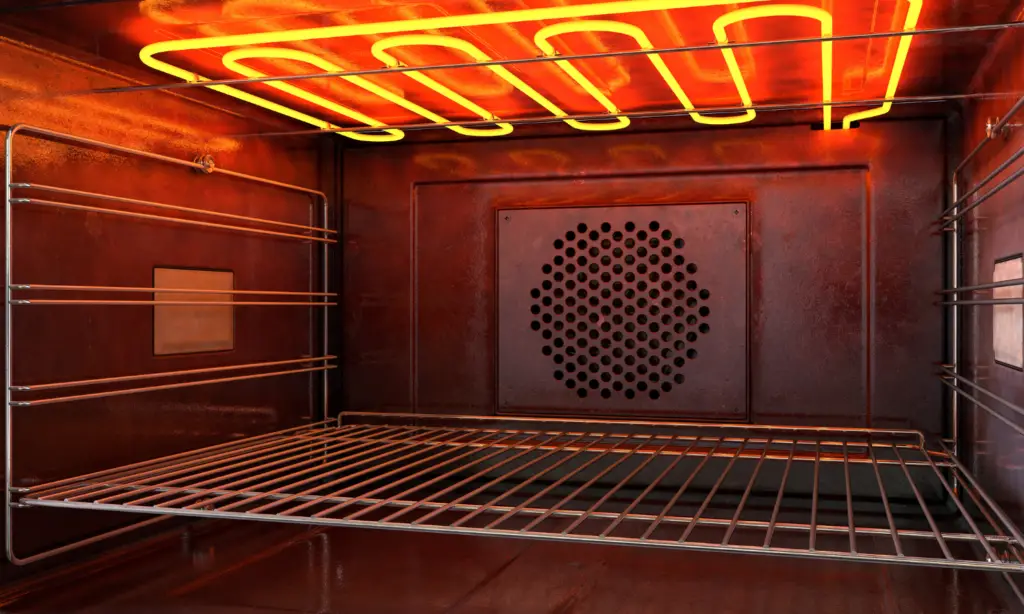
The oven is in many ways the most efficient way to sterilize rocks as it can reach temperatures much higher than boiling water that no living organisms can survive.
In terms of how you clean and sterilize rocks for your pet in the oven, the methodology is not much different from when we sterilize equipment in a microbiology lab.
I follow this protocol when I want to sterilize rocks in the oven:
1. Make sure your rocks are COMPLETELY dry before putting them in the oven.
2. Place your rocks on an oven tray with a few inches in between each rock.
3. Turn the temperature to 392°F (200°C).
4. Leave the rocks to dry autoclave (fancy word for “bake” that we microbiologist use), for 1 hour.
5. Turn off the oven and make sure that the rocks have cooled down (around 1-2 hours depending on the size of rocks).
The downside of using the oven is that it does not actually clean off the dirt and dust that may be present, and it may even chance the color of the rock surface when burning the dust.
Another risk to be aware of is the possibility that air or water is trapped inside rock and will expand upon heating to high temperatures.
If a rock is not completely dry when put in the oven, you may risk that the rock breaks into pieces and in the worst case – explodes!
Is a pressure cooker good for sterilizing rocks?
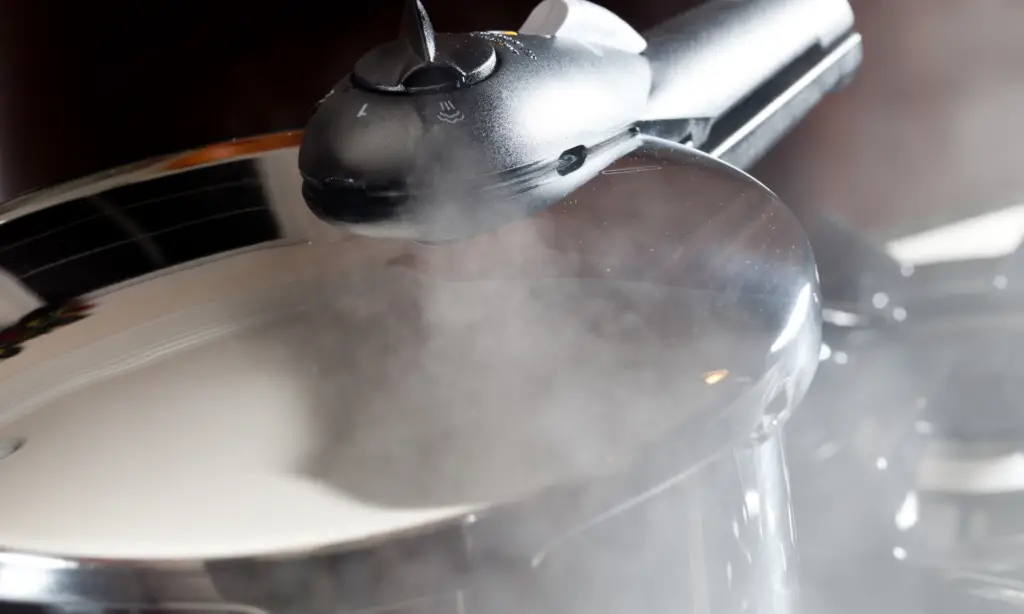
A way to avoid the risk of fracturing rocks, is to use a pressure cooker instead of an oven. A pressure cooker has the advantage of keeping the pressure high while still achieving high temperatures, usually up to 248°F (120°C).
Such high temperatures will kill any living organisms, and the steam and water in the pressure cooker makes sure every part (inside and outside) of the rock has been reached.
For the pressure cooker I usually just add enough water to cover one fourth the way to the lid and then place the rocks into the pressure cooker.
Just make sure the water does not dry out before the process is done.
The actual program is no different from what you would use when cooking. For rocks I recommend 15 minutes at 248°F (120°C). This is what we use in the laboratory to sterilize equipment in the autoclave (fancy word for large pressure cooker) and it works.
The downside of the pressure cooker, and why a generally recommend the oven instead, is the amount of rocks you can typically fit. A normal pressure cooker for kitchen use will only hold a few medium sized or one big rock at a time, whereas the oven can typically get the job done in one go.
And as always, you have to be careful when using a pressure cooker, so I don’t recommend this method unless you have previous experience with pressure cooking.
The protocols shown here are relevant to rocks only and for other materials like wood or soil, you will have to go by the other more gently means of cleaning described in this post about using wood safety with for reptiles and this one about how to sterilize soil for vivariums.
Can I use rocks from outside for my bearded dragon?
Yes, you can use rocks from the outside if you follow my instructions given above carefully. Briefly, you need to wash and sterilize the rocks to make sure they are safe for your bearded dragon.
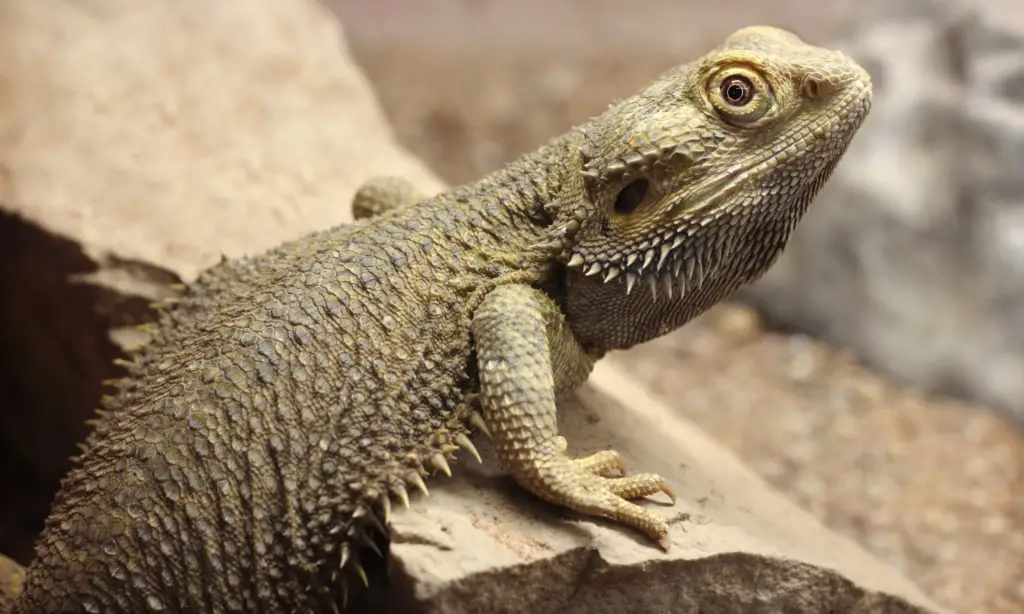
Bearded dragons make great pets because they don’t require a lot of care and their environment generally does not require much attention.
However, bearded dragons do need some type of habitat, either natural or artificial. Rocks are often a good choice and are commonly used for this purpose.
So if you follow the instruction given here, you should be all set to collect and safely place rocks in your bearded dragon enclosure.
Conclusions
Reptiles are one of the most common types of pets in households today, with over 50 species in kept in terrariums country wide, and they all have their own unique susceptibility to germs from the outside.
Also remember that it will not make sense to clean the rocks you use in your terrarium, if you do not do the same for the wood or the sand you give your reptiles.
Reptiles are fascinating creatures, but sometimes they can be quite expensive, so you want to make sure not to kill them right away with a dirty enclosure.
Because they might lick, and even drool, on new rocks or become stressed and loose their tail due to the foreign germs that might be present – be sure to use good and clean materials for your reptile or amphibian enclosure!
It can be a rewarding experience to decorate your own pet enclosure, but doing it in a safe manner for your pet is should be your main priority, and hopefully, this article have thought you how to do so!